How to Put Color Back on Leather Furniture
Leather furniture is a beautiful and durable addition to any home. However, over time, leather furniture can fade and lose its original color. This can be due to a number of factors, such as exposure to sunlight, heat, and wear and tear.
If your leather furniture has faded, there are a few things you can do to restore its color. The first step is to clean and condition the leather. This will help to remove any dirt, dust, or debris that may be preventing the leather from absorbing the recoloring product.
Once the leather has been cleaned and conditioned, you can choose a leather recoloring product. There are two main types of leather recoloring products: dyes and balms. Dyes are more permanent and can change the color of the leather completely. Balms are less permanent and can be used to restore the original color of the leather.
If you are unsure which type of leather recoloring product to use, it is always best to consult with a professional. To apply the leather recoloring product, follow the manufacturer’s instructions carefully. Be sure to test the product in an inconspicuous area before applying it to the entire piece of furniture.
Once the leather has been re-colored, it is important to protect it from further fading. You can do this by applying a leather protector. Leather protectors help to create a barrier on the surface of the leather that repels dirt, dust, and UV rays.
Here is a more detailed explanation of each step involved in re-coloring leather furniture:
Step 1: Clean the leather
To clean the leather, use a mild soap and water solution. Avoid using harsh chemicals or abrasive cleaners, as these can damage the leather. Apply the soap and water solution to a clean cloth and wipe down the leather surface.
Step 2: Condition the leather
Leather conditioner helps to moisturize and protect the leather. Apply the conditioner according to the manufacturer’s instructions. Be sure to apply the conditioner to the entire piece of furniture, paying special attention to any areas that are dry or cracked.
Step 3: Choose a leather recoloring product
When choosing a leather recoloring product, it is important to consider the type of leather you are working with and the desired results. Dyes are more permanent and can change the color of the leather completely. Balms are less permanent and can be used to restore the original color of the leather.
If you are unsure which type of leather recoloring product to use, it is always best to consult with a professional.
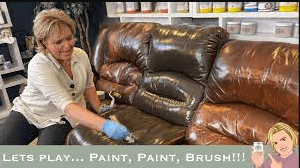
Step 4: Apply the leather recoloring product
To apply the leather recoloring product, follow the manufacturer’s instructions carefully. Be sure to test the product in an inconspicuous area before applying it to the entire piece of furniture. This will help you to ensure that the product is safe to use on your leather furniture and that you are happy with the results.
Step 5: Protect the leather
Once the leather has been re-colored, it is important to protect it from further fading. You can do this by applying a leather protector. Leather protectors help to create a barrier on the surface of the leather that repels dirt, dust, and UV rays.
Tips for getting the best results
- Be sure to clean and condition the leather before applying the recoloring product. This will help to ensure that the leather is properly prepared and that the recoloring product adheres evenly.
- Test the recoloring product in an inconspicuous area before applying it to the entire piece of furniture. This will help you to ensure that the product is safe to use on your leather furniture and that you are happy with the results.
- Apply the recoloring product in thin, even coats. Allow each coat to dry completely before applying the next coat.
- Once you have achieved the desired color, apply a leather protector to help prevent the color from fading again.
Conclusion
Re-coloring leather furniture is a relatively easy process that can help to restore its original beauty. By following the steps outlined in this article, you can achieve professional-looking results at home.